Struggling to manage your i18n YAML files and the accompanying localization work with Ruby on Rails? Well, we have great news for you. GitLocalize is now here to help you take care of all that tedious Rails i18n work!
Get Started
If you haven’t signed up yet, register with GitLocalize for free and get ready to localize your Rails app with zero stress.
Read our blog article to learn more about how GitLocalize works and what it can do for you.
Register Your Rails App
Navigate to the Add Repository page from your profile. Here, you’ll see the form to register your GitHub repository with the GitLocalize platform.
In the middle of the page, specify where your source i18n files are located and where you want to generate translated files.
For example, let’s say that you have source English i18n YAML files at config/locales/en.yml and want to have translated ones at config/locales/ja.yml or config/locales/es.yml. Set the drop-down menu on the left to File, then type config/locales/en.yml for Source Path and config/locales/%lang%.yml for Translation Path.
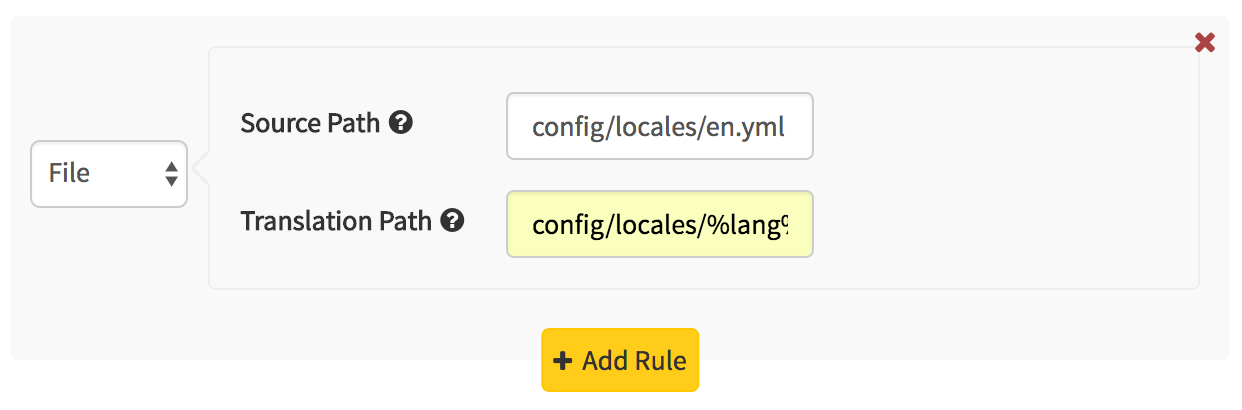
This %lang% is a placeholder for the two-character code of your translation target languages. For example, if you’re translating to Japanese and Spanish, ja.yml and es.yml will be generated, respectively.
If you have multiple i18n files, simply click the + Add Rule button to register more rules.
Start Localizing
Once you submit and add your repository, you can start continuous localization work with your Rails app on GitLocalize.
Simply go to your repository page from your profile, choose a language, navigate to the YAML file, and open the editor. You’re all set!
Check out the video below or our docs to see how the rest of the process works!